
Can You Push a Dryer Flush Against the Back Wall with a Periscope Vent?
Deciding whether you can push a dryer flush against the back wall with a periscope vent is a common dilemma for homeowners looking to reclaim floor space in tight laundry areas. While standard flexible hoses often require several inches of clearance to prevent kinking, a periscope-style vent is specifically engineered to bridge the gap between the appliance and the wall exhaust port.
Understanding the installation requirements and safety constraints is essential for anyone hoping to achieve a clean, built-in look without sacrificing dryer performance or fire safety. This article provides the technical clarity needed to determine if this solution works for your home’s unique layout.
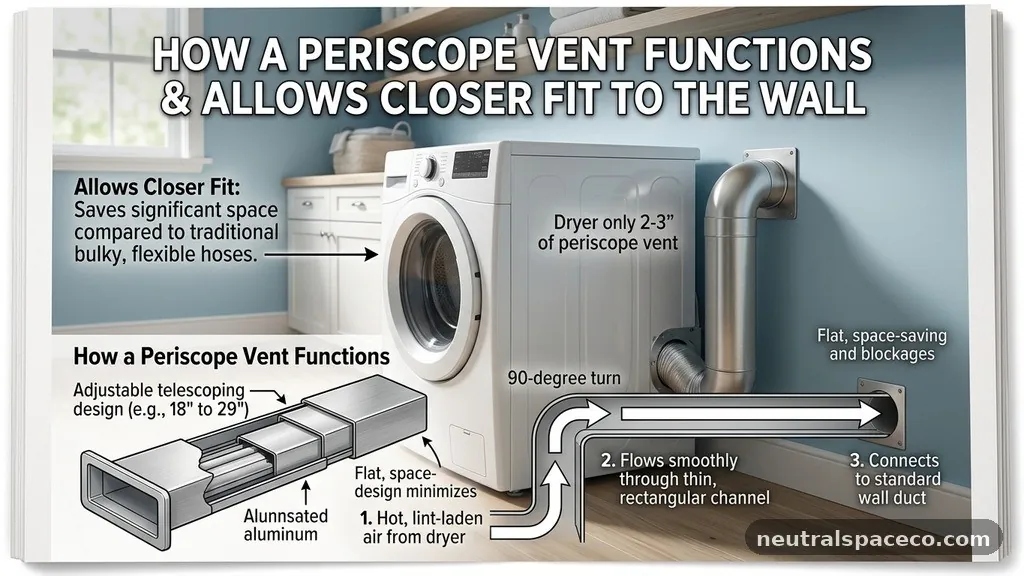
The short answer is yes: you can successfully push a dryer flush against the back wall with a periscope vent, provided your wall exhaust port aligns correctly with the dryer’s outlet. These rigid, adjustable ducts are designed to telescope vertically or horizontally, allowing you to bridge the distance between the machine and the wall with minimal protrusion.
Because they are made of rigid metal rather than flexible plastic or thin foil, they maintain a clear, unobstructed path for exhaust air. By replacing a bulky, kinked hose with a properly installed periscope unit, you can typically gain three to six inches of floor space.
How a Periscope Vent Functions
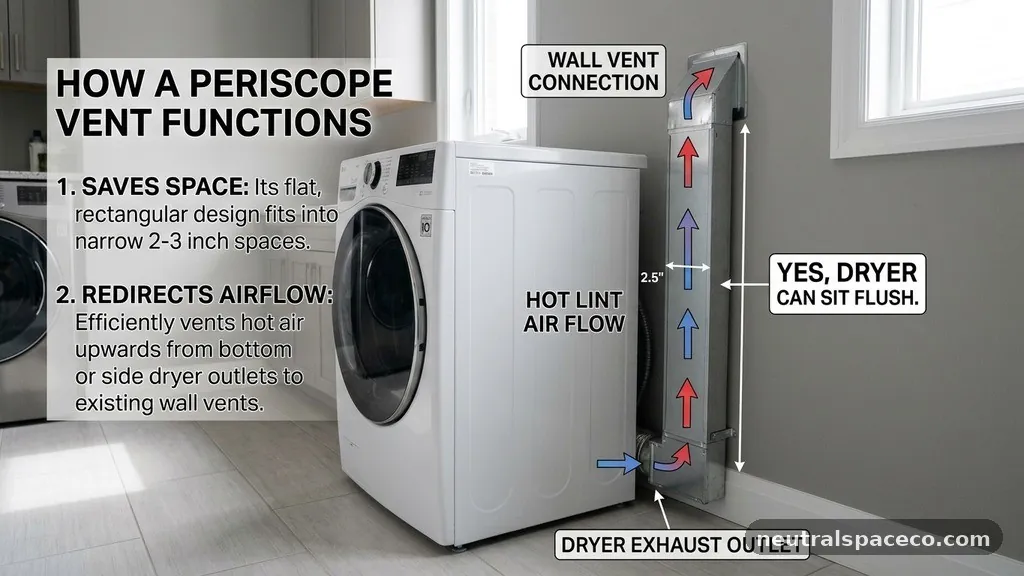
A periscope vent operates on a simple principle of rigid, sliding metal components that create a sealed pathway for air. Unlike flexible accordion-style hoses that compress and expand, these units consist of two or three rectangular metal sleeves that nest inside one another. By sliding these parts, you create a custom-length duct that perfectly matches the distance between your appliance and the wall.
The rectangular profile is the secret to its space-saving ability. Because it is flat rather than round, it can fit into the narrow gap behind a machine that would otherwise be occupied by a bulky circular hose.
This shape ensures that even when the unit is pushed back, the airflow remains consistent. You aren’t crushing a tube; you are simply connecting two points with a solid, albeit adjustable, bridge.
Safety Benefits of Rigid Metal Construction
Safety is the most critical factor when discussing laundry room ventilation. Flexible, foil-style hoses are notorious for trapping lint, which creates a significant fire hazard when the dryer heats up. Because they are prone to kinking or sagging, they restrict airflow and cause the machine to work much harder than necessary.
Periscope vents, being constructed of rigid metal, are much more resistant to these issues. They do not sag over time, and their smooth interior surfaces are far less likely to snag lint fibers as they exit the system. This design promotes better airflow, which actually helps the dryer operate more efficiently and reduces the overall drying time for your clothes.
Verifying Compatibility with Your Setup
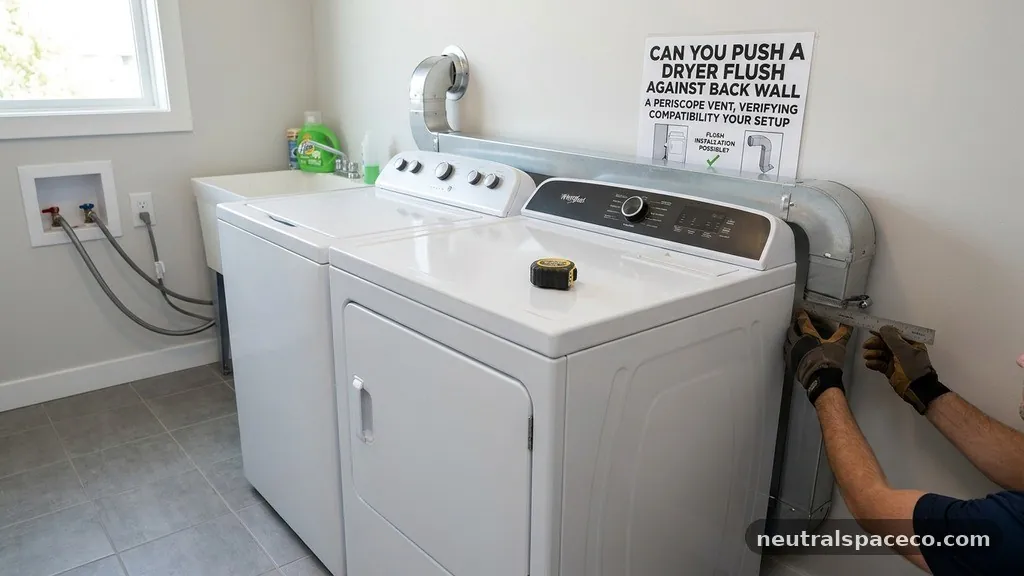
Before purchasing a periscope kit, you must verify that your specific dryer and wall location are compatible. These vents are not one-size-fits-all, and their effectiveness depends entirely on the alignment of the ports. You need to measure the distance from the floor to the center of your wall exhaust and compare it to the height of your dryer’s vent outlet.
If the dryer outlet is significantly higher or lower than the wall port, a standard periscope might not reach. Most units offer a range of vertical adjustment, usually spanning about 10 to 18 inches.
If your ports are offset by more than that, you may need a more complex transition or a custom solution. Always check the manufacturer’s specifications for the specific model of vent you are considering.
Installation Steps for a Flush Fit
Installing a periscope vent requires a bit of patience and precision to ensure a perfect seal. Start by cleaning the area behind the dryer and removing any old, damaged, or flexible ducting that was previously in place. Once the space is clear, attach the dryer-side end of the periscope to the appliance outlet using a sturdy metal clamp.
Next, slide the unit to the approximate length needed before positioning the dryer. As you push the appliance into place, guide the wall-side end of the periscope into the exhaust duct in the wall.
You may need to reach behind or through the side to ensure the connection is seated properly. Once the dryer is in its final position, tighten all clamps to ensure no air escapes at the joints.
The Importance of Proper Sealing
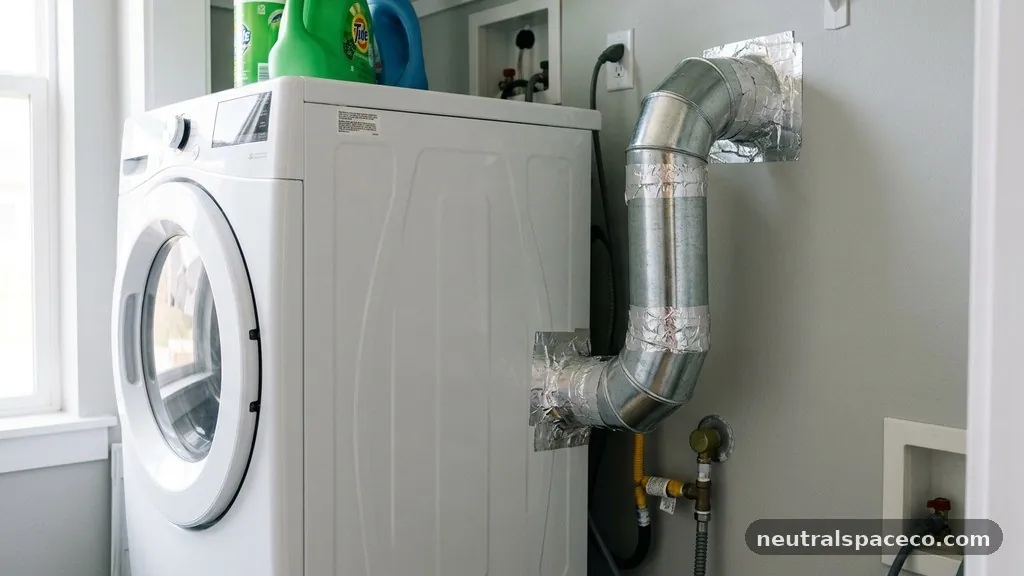
Even with a rigid periscope, a poor connection at the joints will defeat the purpose of the installation. If air escapes behind the dryer, it will deposit moisture and lint directly into your wall cavity or onto the back of the machine. This can lead to mold growth or, at the very least, an incredibly messy laundry room.
Use high-quality aluminum foil tape to seal every connection point where the periscope meets the dryer or the wall port. Do not use standard duct tape, as the heat from the dryer can cause the adhesive to fail over time. Proper sealing is the final step in ensuring that your hard work results in a safe, efficient, and truly flush setup.
Common Challenges During Installation
The biggest challenge people face is the lack of accessibility behind the machine. If you are working in a cramped closet, you might find it difficult to reach the back to tighten clamps or apply tape. Some installers find it helpful to connect the periscope to the dryer first, then pull it out to the wall port as they slide the machine into place.
Another common issue is the wall port itself not being perfectly aligned with the center of the dryer. If your wall exhaust is located to the far left or right of the machine, a standard vertical periscope will not work. In these cases, you might need a combination of a periscope and a short piece of semi-rigid ducting to bridge the horizontal gap.
Maintenance and Lint Removal
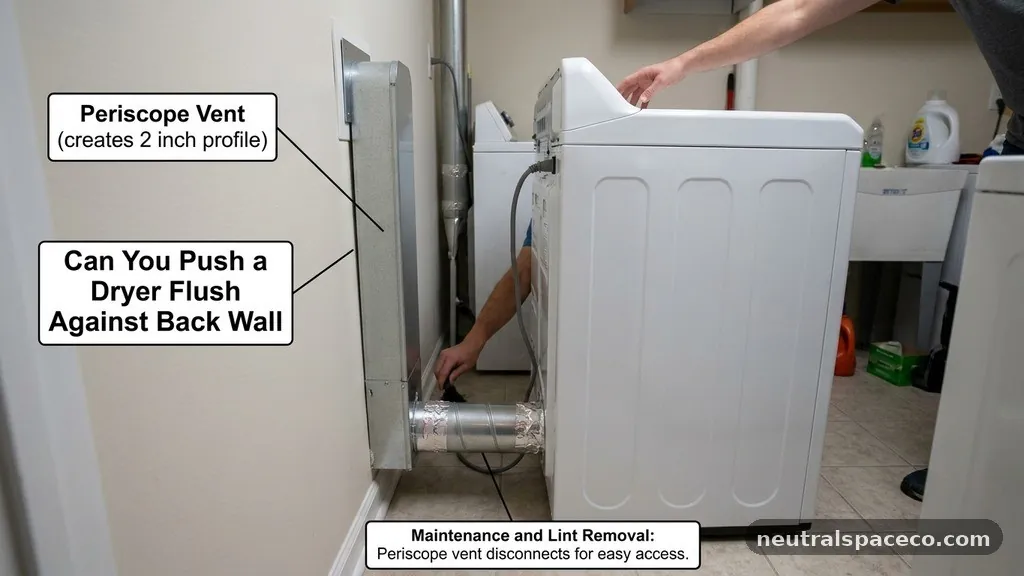
Even though periscope vents are more efficient than flexible hoses, they are not maintenance-free. Lint will eventually accumulate in any ventilation system, regardless of the material used. You should plan to pull your dryer away from the wall at least once a year to inspect the periscope for any blockages.
Check the joints to ensure the tape is still holding firm and that the metal hasn’t shifted. If you notice that your clothes are taking longer to dry than usual, it is a clear sign that the vent needs to be cleaned. A simple vacuuming of the periscope interior is usually enough to restore full airflow and keep your home safe.
Choosing the Right Materials
When shopping for parts, you will encounter various grades of aluminum and steel. Always opt for heavy-duty metal components rather than lightweight, thin-walled versions. The thin versions can dent easily, which ruins the airflow and makes it difficult to achieve a smooth, flush fit against the wall.
It is also worth noting that some local building codes have specific requirements regarding dryer venting. You can check the International Association of Certified Home Inspectors for guidelines on proper venting practices to ensure your setup meets standard safety criteria. Following these professional standards will give you peace of mind and help you avoid issues during future home inspections.
Comparison of Venting Options
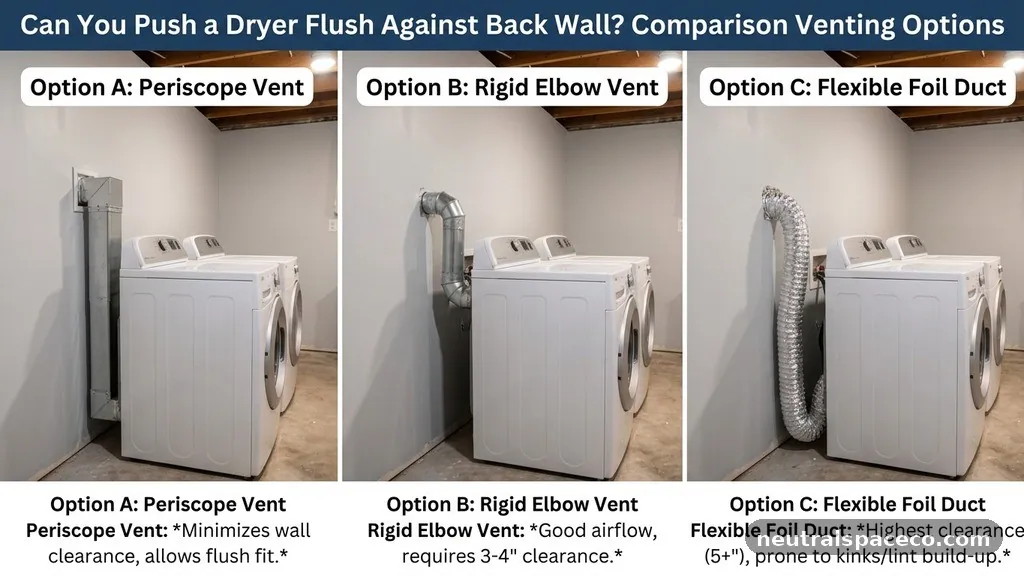
To understand why a periscope is often the best choice for tight spaces, consider how it compares to other common venting methods. The following table highlights the primary differences in space requirements and installation complexity for standard laundry setups.
| Vent Type | Space Required | Durability | Best For |
|---|---|---|---|
| Flexible Foil Hose | 6-10 inches | Low | Temporary setups |
| Semi-Rigid Metal | 4-6 inches | Medium | Standard installations |
| Periscope Vent | 0-2 inches | High | Tight, flush setups |
Frequently Asked Questions
Do periscope vents restrict airflow more than round pipes?
No, a well-installed periscope vent generally provides excellent airflow because it is made of smooth, rigid metal. Since it avoids the sharp bends and kinks common with flexible hoses, it often results in better performance, provided the transitions are properly sealed.
Can I use a periscope vent if my wall outlet is on the side?
Most periscope vents are designed for vertical or horizontal alignment, but they are not universal. If your wall outlet is on the side, you may need a specialized offset adapter or a combination of rigid elbow pieces to reach the port without kinking the duct.
Is it dangerous to have the dryer pushed completely flush?
As long as the vent is properly connected and the dryer has enough room for its own internal airflow, it is not inherently dangerous. However, you must ensure the dryer itself is not vibrating against the wall, which could cause the duct to disconnect over time.
What should I do if the periscope doesn’t reach the wall?
If the distance is too great for a single periscope unit, you can purchase extension pieces or use a short section of semi-rigid metal ducting to bridge the gap. Never attempt to use a plastic hose to cover the remaining distance, as this creates a significant fire hazard.
Can I install a periscope vent by myself?
Yes, it is a manageable DIY project for most homeowners. You will need basic tools like a screwdriver, a utility knife for cutting the metal if necessary, and high-quality foil tape, but the process is straightforward if you take your time.
Final Considerations for Your Laundry Room
Achieving a flush look in your laundry room is entirely possible with the right hardware. By using a periscope vent, you remove the clutter of bulky hoses and create a safer, more efficient exhaust system for your dryer. Remember that the key to success lies in accurate measurements, careful installation, and ensuring that all connections are airtight.
While the initial setup might take a bit of extra effort to align the ports, the result is a professional, space-saving finish that lasts for years. If you follow these steps, you can confidently push your dryer flush against the back wall and enjoy a more functional, clean, and organized space in your home.