
10 DIY Coffee Tables from Old Furniture
There’s a particular kind of satisfaction that comes from walking past a piece of furniture on the curb, in a thrift store, or gathering dust in your own garage, and seeing something completely different in it. A coffee table, as it turns out, is one of the most forgiving DIY projects you can attempt, because so many everyday objects already have the right shape, height, or footprint hiding inside them.
In my experience, most people overthink furniture upcycling. They assume it requires woodworking skills, power tools, or a garage full of equipment. A mistake many homeowners make is assuming a DIY coffee table has to be built from scratch, when in reality, some of the best ones start with a piece of furniture that’s already 90 percent of the way there — an old trunk, a stack of vintage suitcases, a discarded door.
I’ve seen this idea transform living rooms on a shoestring budget more than almost any other project, largely because coffee tables are expensive to buy new but relatively simple to reimagine. Beyond the cost savings, there’s something genuinely appealing about a table with a story behind it, especially compared to something mass-produced that looks identical in a hundred other living rooms.
This guide walks through ten pieces of old furniture that can be transformed into a coffee table, plus the practical reasoning and styling advice behind each one. Whether you’re working with something inherited, thrifted, or already sitting unused in storage, there’s likely a project here that fits.
Table of Contents
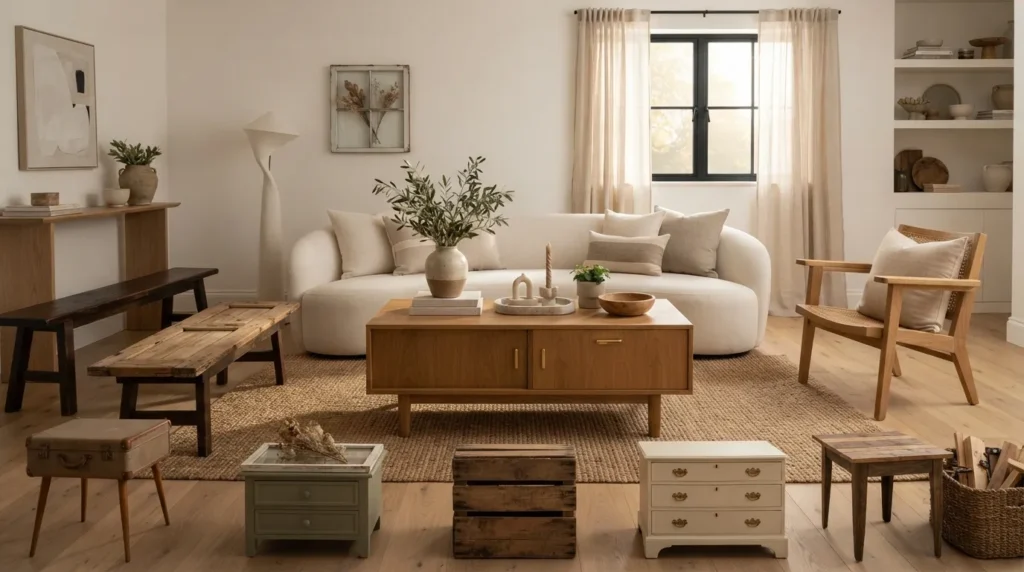
- Vintage Trunk Table — Turning a storage trunk into a table with built-in function.
- Stacked Suitcase Table — Layering vintage luggage for a collected look.
- Salvaged Door Table — Repurposing a flat door as a tabletop surface.
- Reclaimed Window Table — Using an old window frame as a glass-top display.
- Wine Crate Table — Combining wooden crates into a modular base.
- Dresser Drawer Table — Repurposing drawers for storage-forward styling.
- Ottoman-to-Table Conversion — Adding a hard top to soft seating.
- Ladder Base Table — Using an old ladder as a rustic table frame.
- Wooden Spool Table — Turning an industrial spool into a statement piece.
- Chair Seat Table — Repurposing a single chair into a petite side table.
1. Vintage Trunk Table
Quick Benefits
- Adds built-in hidden storage
- Works as an instant conversation piece
- Requires minimal tools or skill
- Fits farmhouse, vintage, or eclectic styles
- No cutting or major construction needed
Why It Works
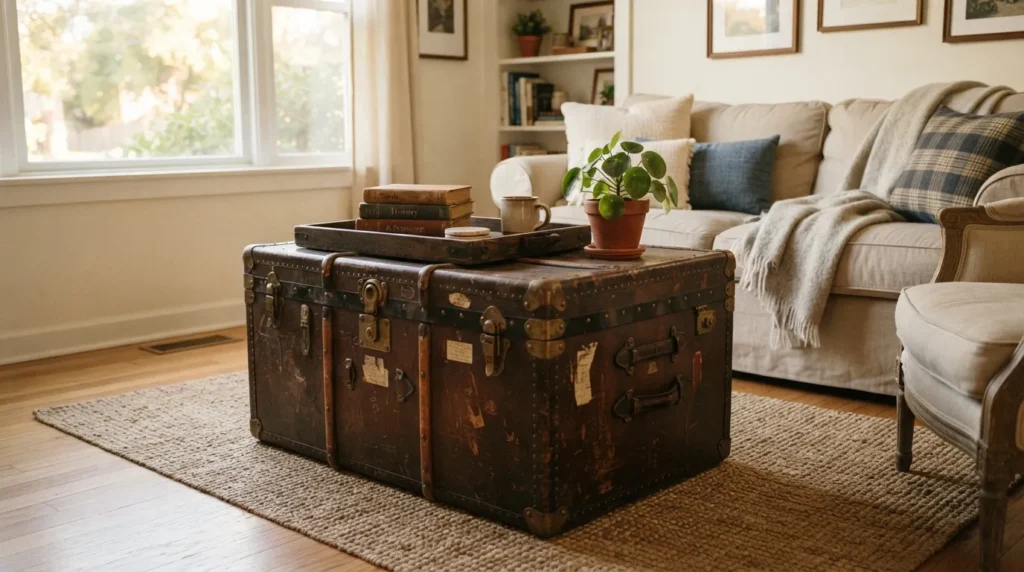
A vintage trunk is one of the easiest pieces to convert because it’s already the right height and footprint for a coffee table, and it comes with a built-in bonus most tables don’t offer: storage. In my experience, this is the single most beginner-friendly project on this list, since the trunk itself does almost all of the structural work already.
How To Style It
Add furniture feet or a simple wood base underneath if the trunk sits too low or needs added stability, and consider a small furniture-grade caster set if you want it mobile. Clean and condition any leather or wood exterior before styling on top, and finish with a tray, a stack of books, and a small plant to soften the hard surface. Leave the latch functional so the storage inside stays usable for blankets or magazines.
2. Stacked Suitcase Table
Quick Benefits
- Uses items that are otherwise hard to repurpose
- Creates a layered, collected look
- Ideal for small or vintage-style spaces
- No permanent alterations required
- Easy to disassemble or rearrange later
Why It Works
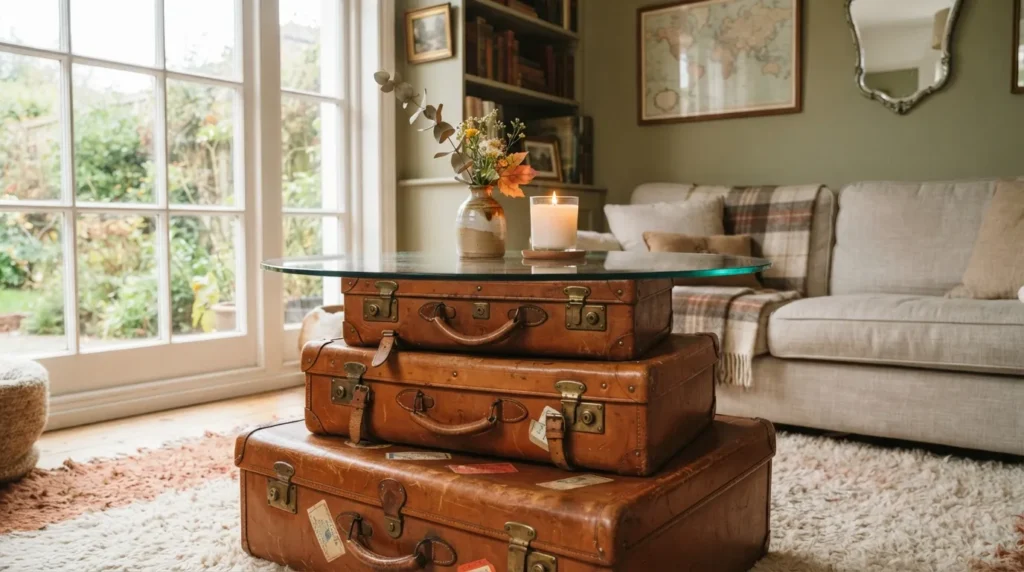
Vintage suitcases are notoriously difficult to find a second life for once they’re no longer used for travel, which makes this project especially satisfying. Stacked in graduating sizes, three or four suitcases create a surprisingly sturdy tabletop height while adding the kind of layered, collected character that’s hard to buy off a shelf. That’s why many designers recommend this specific project for eclectic or vintage-leaning living rooms.
How To Style It
Stack suitcases from largest to smallest, securing them together with heavy-duty double-sided furniture tape or small L-brackets on the interior sides for stability. A flat piece of glass or wood cut to the top suitcase’s dimensions creates a usable, level surface for drinks or decor. Choose suitcases in a coordinated but not identical color family — two or three tones of brown leather, for example — for a look that feels intentional rather than mismatched.
3. Salvaged Door Table
Quick Benefits
- Uses a piece otherwise destined for landfill
- Creates a large, statement-making surface
- Works well in farmhouse or industrial spaces
- Highly customizable finish options
- Sturdy once properly based
Why It Works
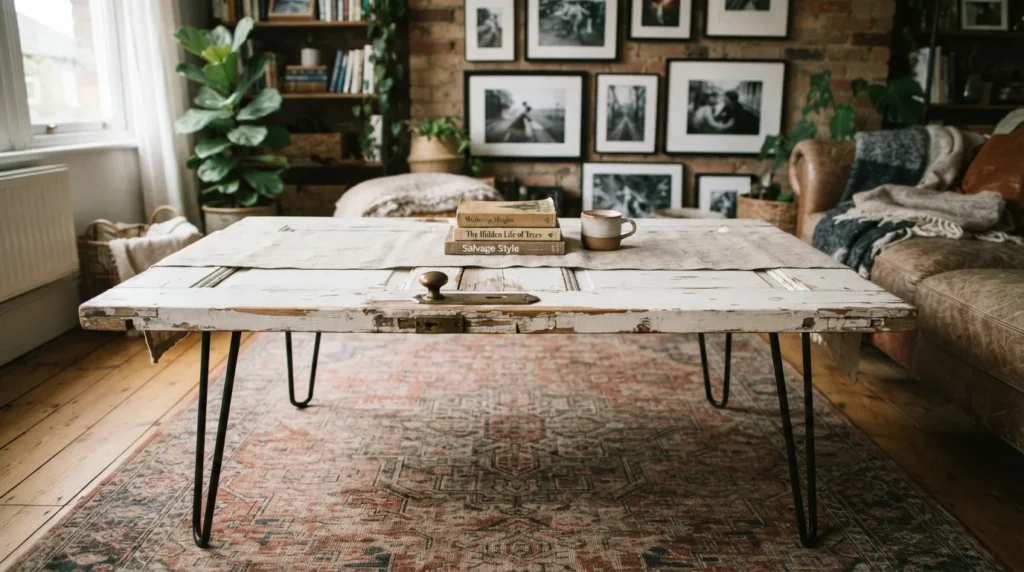
An old door, especially one with paneling, glass inserts, or interesting hardware, has far more visual character than a standard flat tabletop. One thing that works especially well about this project is the sheer size — most doors are large enough to serve as a substantial coffee table surface without needing to combine multiple pieces, unlike some smaller upcycled projects.
How To Style It
Sand and refinish the door’s surface, keeping any original hardware like knobs or hinges as decorative details if they don’t interfere with usability. Attach a sturdy base — reclaimed table legs, a metal hairpin leg set, or a simple built wood frame — sized to sit just below standard coffee table height, typically 16 to 18 inches. If the door has a glass panel insert, that section can double as a small display window for collected objects underneath.
4. Reclaimed Window Table
Quick Benefits
- Creates a naturally divided display surface
- Adds architectural character to the room
- Works well as a glass-top table
- Ideal for cottage or vintage interiors
- Relatively lightweight compared to solid wood options
Why It Works
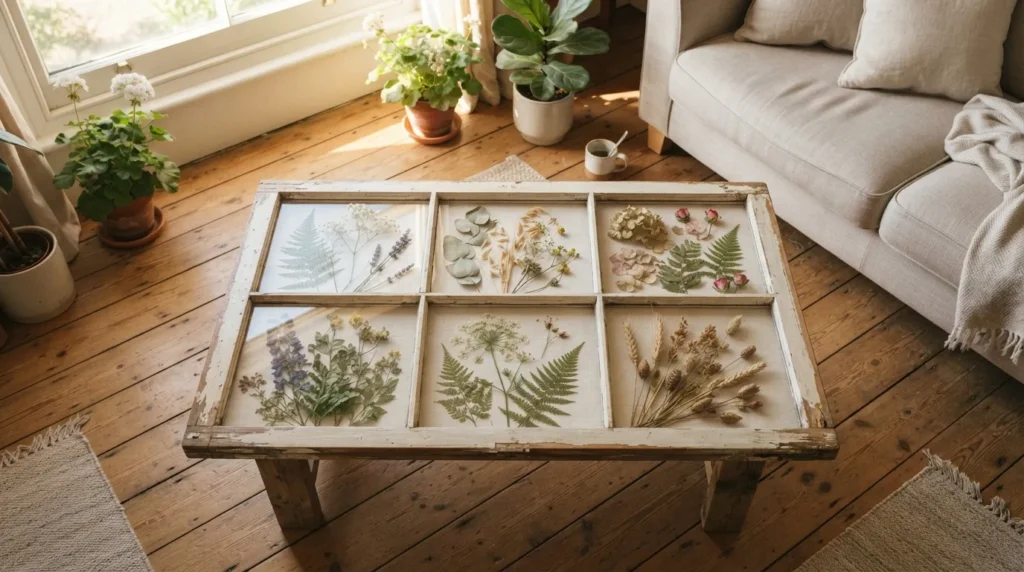
An old multi-pane window frame naturally divides its surface into sections, which creates built-in visual interest without any extra design work. I’ve noticed this project works especially well for anyone wanting a glass-top table with more personality than a plain sheet of glass alone provides, since the wood grid does the styling for you.
How To Style It
Lay the window frame flat and secure a piece of tempered glass cut to size on top for a usable, level surface — this also protects the frame itself from wear. Mount the frame on simple hairpin legs or a low reclaimed wood base. For a layered display effect, place small collected items like pressed flowers, postcards, or trinkets beneath the individual panes before adding the glass.
5. Wine Crate Table
Quick Benefits
- Modular and easy to customize in size
- Naturally rustic, farmhouse-friendly look
- Affordable, especially if crates are free or cheap
- Simple to assemble with basic tools
- Offers built-in cubby storage
Why It Works
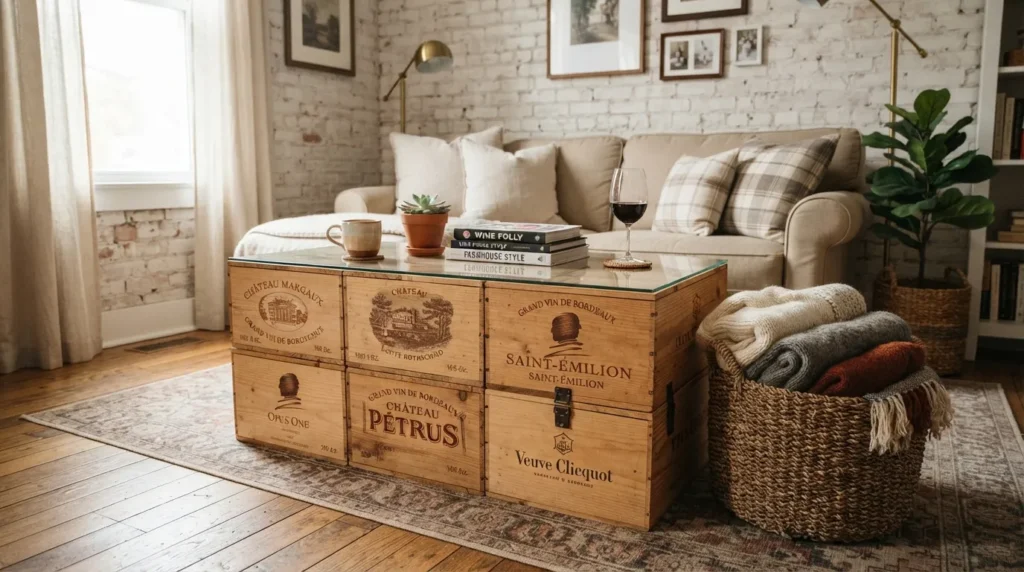
Wooden wine or produce crates are inexpensive, widely available secondhand, and naturally modular, meaning the table’s final size is entirely up to how many crates you use. A mistake many homeowners make when attempting this project is gluing crates together permanently before testing the layout — it’s worth arranging and rearranging first, since the modularity is part of the appeal.
How To Style It
Arrange four to six crates in a two-by-three or two-by-two grid, securing them together with wood screws or L-brackets along the interior seams. Add a flat wood or glass top cut to the combined dimensions for a smooth, usable surface, or leave the crate tops exposed for a more rustic, open-cubby look. Stain or paint uniformly for a cohesive finish rather than mixing raw and finished wood tones.
6. Dresser Drawer Table
Quick Benefits
- Repurposes drawers that often go unused
- Adds a unique compartmentalized display
- Works with drawers of mismatched sizes
- Minimal tools required for assembly
- Great use for a dresser too damaged to restore
Why It Works
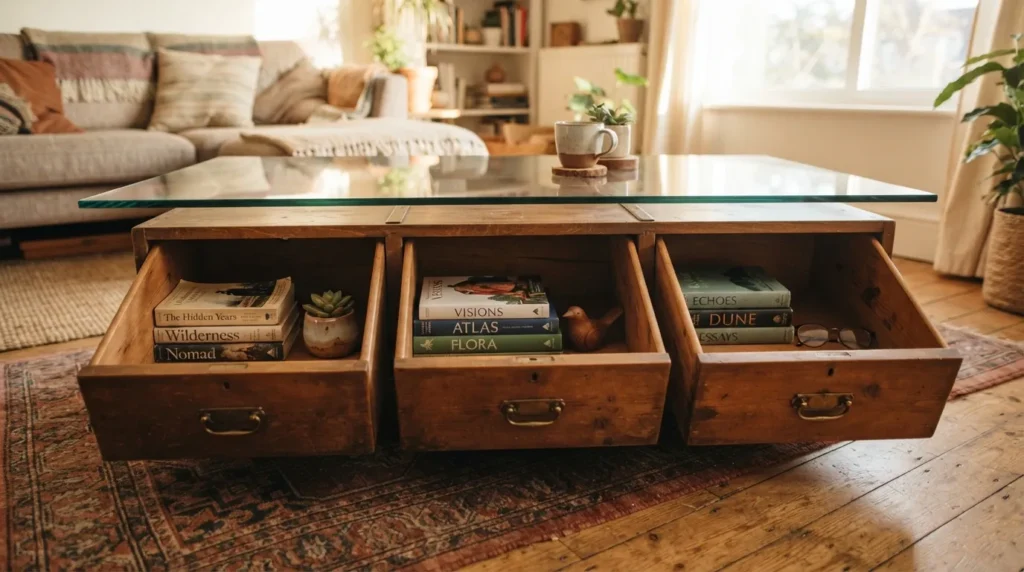
When a dresser is too damaged to restore as a full piece but the drawers themselves are still solid, this project gives those drawers a meaningful second life. Arranged and secured together, dresser drawers create a naturally compartmentalized table surface, almost like built-in shadow boxes. In my experience, this is one of the more unexpected projects on this list, and one that generates the most conversation from guests.
How To Style It
Arrange two to four drawers of similar height side by side, securing them together at the sides with wood screws or brackets. Add a flat top across the combined surface, or leave the drawers open-faced for a display shelf effect underneath a glass top. Sand and refinish the exterior wood to match your existing furniture, and consider adding new drawer pulls if the originals are damaged or missing.
7. Ottoman-to-Table Conversion
Quick Benefits
- Adds a hard surface to soft, existing furniture
- No cutting or major construction involved
- Reversible if you want the ottoman back later
- Works with almost any upholstered ottoman
- Budget-friendly compared to buying new
Why It Works
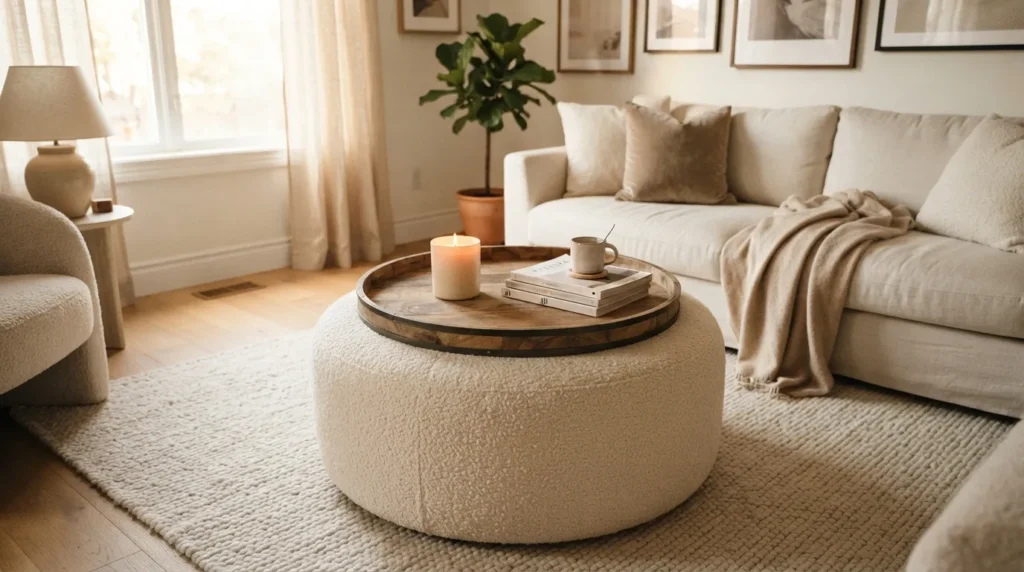
An upholstered ottoman already has the right height, footprint, and stability for a coffee table — it just lacks a hard, usable surface on top. This is one simple trick I always suggest to anyone who already owns an ottoman they’re not using, since it requires no cutting, sanding, or major tools, just a properly sized tray or fitted top.
How To Style It
A large wood serving tray placed on top instantly converts the ottoman into a usable table surface for drinks or decor, while remaining easy to remove if you want the soft ottoman surface back for footrest use. For a more permanent option, a custom-cut wood or acrylic top can be fitted with hook-and-loop fasteners along the underside, keeping it secure but still removable. Choose a tray or top slightly smaller than the ottoman’s surface so the upholstered edge remains visible.
8. Ladder Base Table
Quick Benefits
- Adds rustic, architectural character
- Ideal for farmhouse or industrial interiors
- Uses an item most people already have in storage
- Creates a visually interesting under-table storage area
- Relatively simple build with basic tools
Why It Works
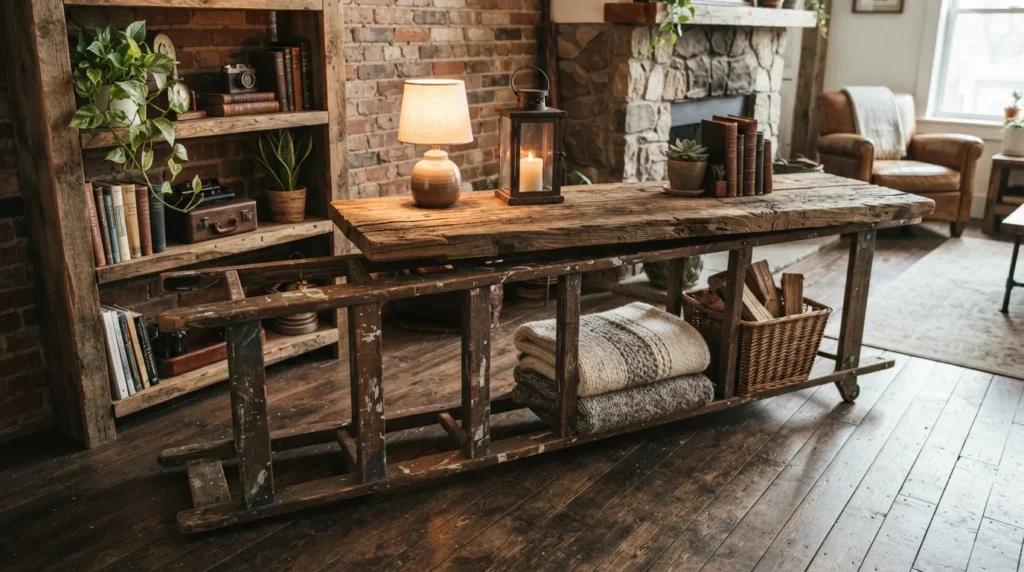
An old wooden ladder, especially a stepladder, has natural angles and sturdiness that lend themselves surprisingly well to a table base. A mistake many homeowners make is storing a broken or unused ladder indefinitely rather than seeing its potential — laid flat or used as a frame, it becomes one of the more architecturally interesting bases on this list.
How To Style It
For a flat-lying ladder table, secure a wood plank or reclaimed board across the rungs to create a stable surface, and add short furniture feet underneath the ladder’s sides for the correct table height. For a more sculptural option, use two ladder sides as angled legs supporting a single tabletop slab. Either approach leaves the rungs visible underneath as a natural, built-in shelf for baskets or books.
9. Wooden Spool Table
Quick Benefits
- Naturally industrial, statement-making look
- Sturdy without additional structural work
- Minimal finishing required
- Works well as a rustic focal point
- Often available free or low-cost from salvage yards
Why It Works
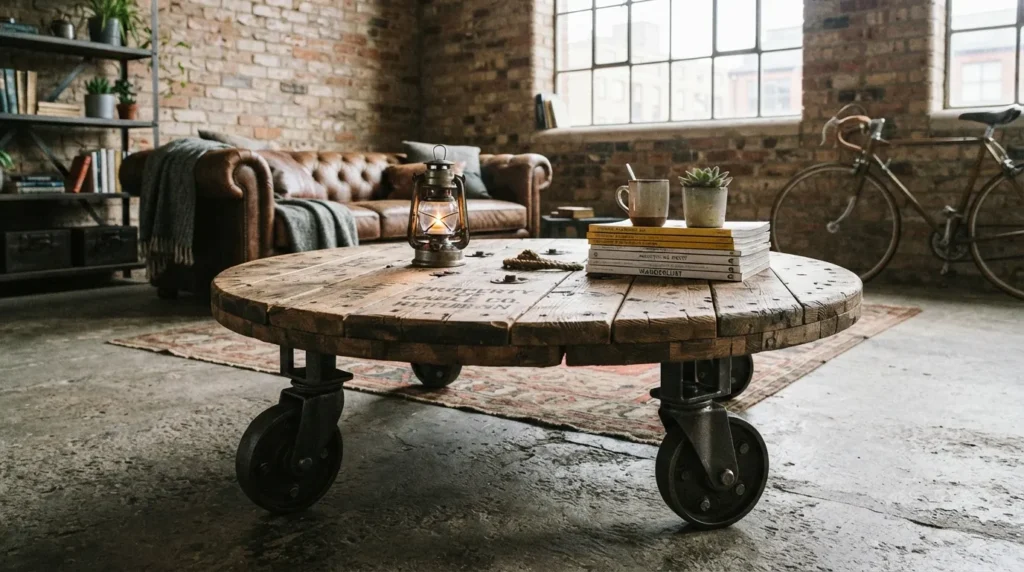
Large wooden cable spools were designed to hold significant weight, which makes them naturally sturdy candidates for a coffee table with almost no structural modification needed. That’s why many designers and DIY enthusiasts return to this project again and again — it delivers an industrial, statement-making look with comparatively little effort.
How To Style It
Sand down any rough or splintered edges and apply a wood conditioner or sealant to smooth the surface for everyday use. Add furniture casters underneath for mobility, which is especially useful given the spool’s weight, or leave it stationary on felt pads to protect flooring. A round glass top cut to size can be added for a smoother, more polished finish if the raw wood surface feels too rustic for the rest of the room.
10. Chair Seat Table
Quick Benefits
- Perfect for a petite side or accent table
- Uses a single chair that’s otherwise unusable
- Quick project with minimal materials
- Adds a whimsical, unexpected detail
- Great for small spaces needing an accent piece
Why It Works
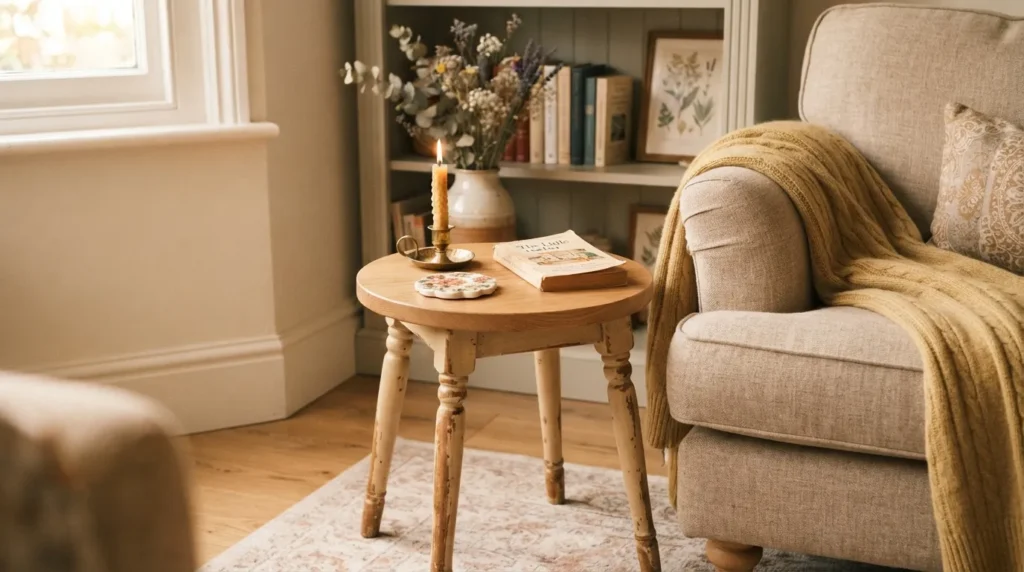
Not every project on this list needs to result in a full-sized coffee table — a single vintage chair with a damaged back or broken structure can be repurposed into a small accent table instead. I’ve seen this idea used especially well beside an armchair or sofa end, filling a gap that a full coffee table wouldn’t fit into anyway.
How To Style It
Remove the chair back if damaged, and add a flat round or square top cut to fit the seat’s existing frame, securing it with wood screws from underneath. Sand and refinish the chair legs to match nearby furniture, or leave them painted in a contrasting color for a more playful look. Style the small surface simply — a single candle, a coaster, or a small stack of books is usually enough given the compact size.
Frequently Asked Questions
What old furniture works best for a DIY coffee table? Trunks, doors, ladders, and sturdy dressers tend to work best because they already have the right height, footprint, or structural stability, requiring minimal modification. Items with a flat or naturally level surface are the easiest starting points for beginners.
Do I need woodworking experience to build a DIY coffee table? No. Several projects, like the ottoman conversion or vintage trunk table, require no cutting or advanced tools at all, just basic assembly and styling. More involved projects, like the salvaged door table, benefit from basic sanding and finishing skills but don’t require advanced carpentry.
How do I add a base to an item that’s too low or too high? Furniture feet, hairpin legs, or a simple built wood frame can be added underneath to reach the standard coffee table height of 16 to 18 inches. Many hardware and craft stores sell pre-made leg sets designed specifically for this kind of furniture project.
Is it cheaper to build a coffee table than buy one? In most cases, yes, especially when the base piece is thrifted, inherited, or already owned. The primary costs are typically a tabletop surface, a base or legs if needed, and finishing materials like sealant or paint.
What tools do I need for these projects? A basic tool kit covers most of these projects: a drill, wood screws, sandpaper, wood glue, and a saw for cutting a tabletop to size. Some projects, like the ottoman conversion, require no tools beyond a tape measure.
Can I make a glass-top DIY coffee table safely? Yes, as long as you use tempered glass cut to the exact dimensions needed and have it professionally cut with polished edges. Standard untempered glass is not recommended for tabletop use due to breakage risk.
How do I make sure a repurposed table is sturdy enough for daily use? Reinforce all joints and connection points with wood screws or L-brackets rather than relying on glue alone, and test weight-bearing capacity before styling the table with heavier decor. Adding felt pads or furniture feet also helps distribute weight evenly.
Conclusion
A DIY coffee table doesn’t need to start with raw lumber and a table saw. Some of the most interesting, conversation-starting pieces begin with furniture that’s already halfway finished — a trunk, a door, a stack of suitcases — waiting for a second purpose. These projects prove that a coffee table with real character is often more accessible, and more affordable, than buying one new.
Start with one or two ideas and gradually build a space that reflects your style and supports everyday comfort. Even a single repurposed piece can become the most talked-about item in the room, simply because it has a story that a store-bought table never could.
Related Articles
- DIY Accent Wall Ideas
- Small Living Room Layouts
- Modern Farmhouse Decor
- Thrifted Home Decor Finds
- How to Style Open Shelving