Side Clearance: How Much Gap Needed Between Washer and Dryer to Stop Banging?
Determining the proper side clearance for your laundry equipment is essential for both performance and peace of mind. Many homeowners find that their machines vibrate aggressively, creating a loud, banging sound that can damage nearby surfaces or the appliances themselves. Understanding how much gap is needed between your washer and dryer will help you avoid these issues while ensuring your units operate efficiently.
By following manufacturer recommendations and accounting for natural machine movement during heavy cycles, you can create a setup that remains stable and quiet. This article provides the specific spacing requirements and practical installation tips you need for a professional-grade laundry room configuration.
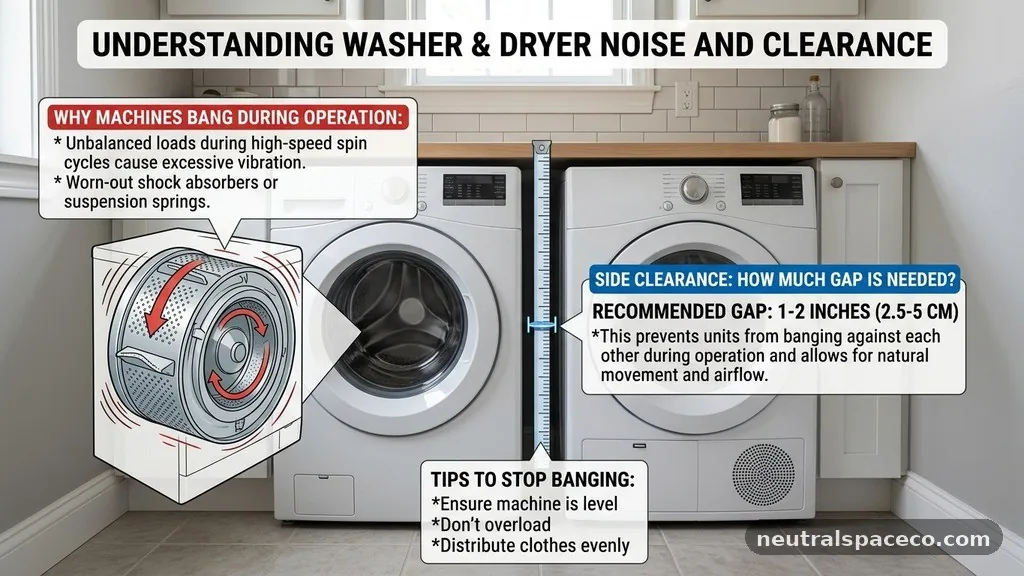
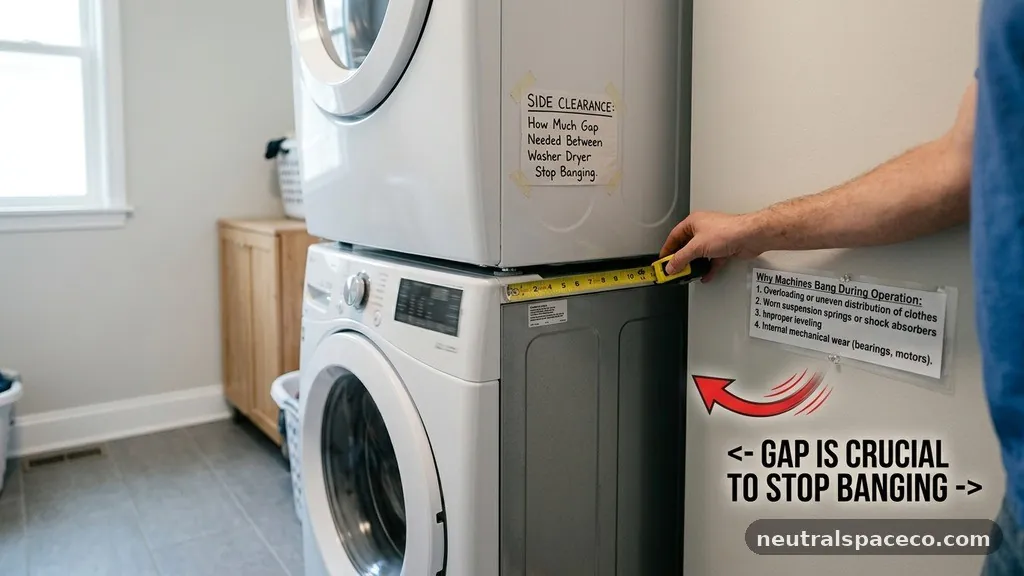
To prevent your appliances from banging against each other or the surrounding cabinetry, you should aim for a minimum of 1 inch of side clearance between the washer and dryer. While some manufacturers claim their units can be placed closer, a 1-inch gap provides enough room for the washing machine to shift during the spin cycle without making contact.
If you are installing your units in a tight closet or an alcove, you must also consider the clearance on the exterior sides. Ideally, you should maintain at least 1 inch of space on every side of the machines to allow for heat dissipation and to prevent vibrations from transferring into the walls.
Why Machines Bang During Operation
Washing machines, particularly front-loading models, are designed to spin at very high speeds to extract water from fabrics. During this process, the internal drum moves significantly, which causes the entire chassis to oscillate or “walk” if the load is unbalanced.
When the machine is placed too close to a dryer or a side wall, these vibrations cause the metal or plastic casing to strike the adjacent surface. This contact produces the loud, rhythmic banging that many homeowners find alarming.
The intensity of the vibration often depends on the floor surface beneath the machines. Concrete floors provide the most stability, while wood-framed floors may flex, amplifying the movement of the appliance.
If your washing machine is not perfectly level, the centrifugal force during the spin cycle becomes uneven, leading to more aggressive shaking. Ensuring that your floor is level and that your machine is properly secured is the first step in reducing the noise caused by insufficient side clearance.
Standard Dimensions and Space Requirements
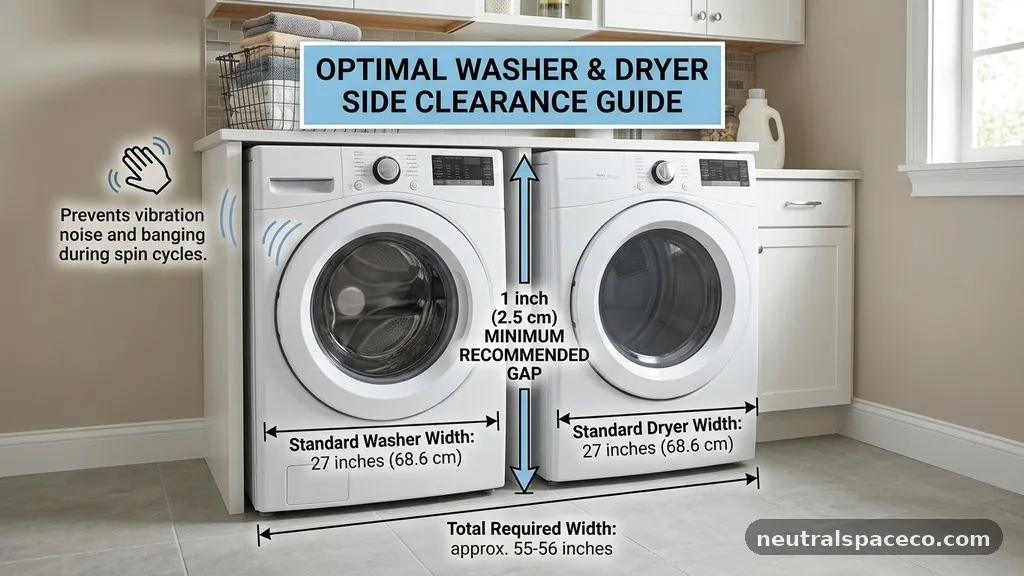
Most modern residential washing machines and dryers have a standard width of approximately 27 inches. However, high-capacity models can range from 29 to 30 inches in width, while compact or stackable units may be as narrow as 24 inches.
You must measure your specific models before finalizing your floor plan, as the advertised width does not always account for protruding doors, knobs, or hoses. Relying on “standard” sizes can lead to significant installation errors if your chosen models deviate from the norm.
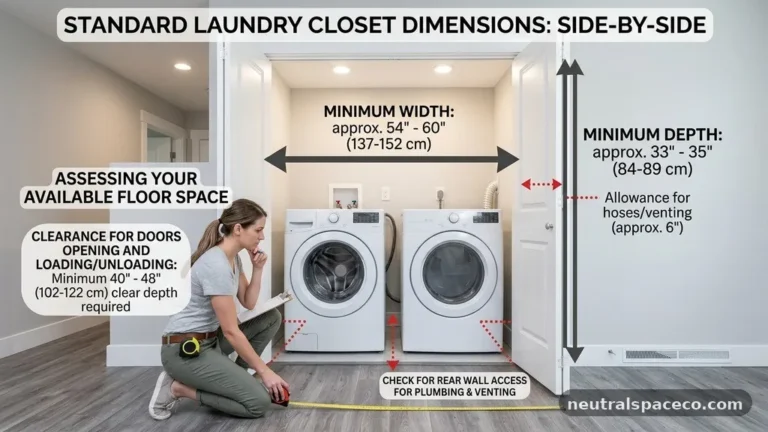
When calculating your total laundry room width, you must sum the widths of both machines plus the necessary gaps. For two 27-inch units, you need at least 54 inches of machine width plus 3 inches for the gaps on the left, right, and center.
This results in a minimum total width of 57 inches for a comfortable, side-by-side installation. Always verify these measurements against the Energy Department guidelines for laundry appliances to ensure your setup meets ventilation and safety standards.
The Role of Anti-Vibration Pads
If you find that you cannot provide the ideal amount of space due to limited room dimensions, anti-vibration pads offer a practical solution. These small, rubberized discs sit under each of the machine’s four feet and serve to dampen the mechanical energy transferred to the floor.
By absorbing the kinetic energy of the spin cycle, they can significantly reduce the tendency of a washer to move during operation. They are particularly effective on smooth surfaces like tile or linoleum where machines are prone to sliding.
Installation is straightforward, requiring you to lift each corner of the machine slightly to slide the pad under the leveling foot. Once installed, ensure that the machine remains level by using a carpenter’s level on the top surface.
If the pads are uneven, the machine will wobble, which might actually increase the noise rather than reduce it. Check the pads every few months to ensure they haven’t compressed or shifted out of position over time.
Managing Rear and Top Clearance
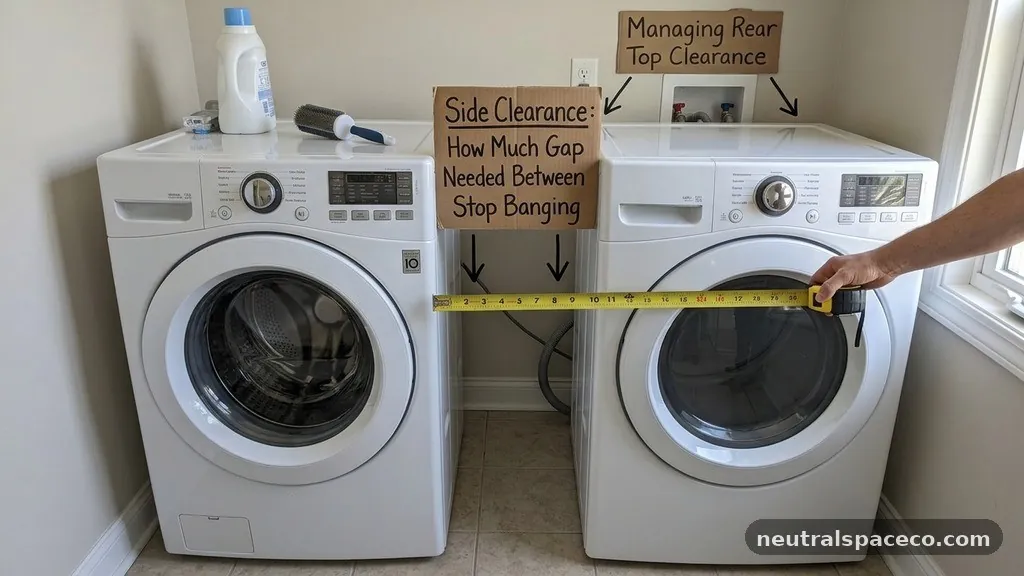
While side clearance is critical for stopping the banging sound, you must not ignore the space behind and above your appliances. Dryers require significant airflow to vent hot, moist air outside, and a restricted vent path can lead to overheating.
A minimum of 4 to 6 inches of space is typically required behind the dryer to accommodate the vent hose without kinking it. Kinked hoses are a major fire hazard and can also cause the dryer to vibrate against the wall, contributing to the overall noise level.
Top clearance is equally important, especially if you have a top-loading washing machine. You need enough vertical space to fully open the lid without hitting overhead shelving or cabinets.
If you are using a front-loading set on pedestals, remember that the pedestal adds height to the unit, potentially obstructing your existing storage. Measure from the floor to the lowest point of any overhead obstruction to ensure the doors and lids have a clear path to swing open.
How to Level Your Machines Correctly
A machine that is not level will inevitably vibrate more, even if you have provided adequate side clearance. Most washers have adjustable feet that can be screwed in or out to compensate for an uneven floor.
You should start by placing a bubble level on the top of the machine in both the front-to-back and side-to-side directions. Adjust the feet until the bubble sits perfectly in the center of the gauge.
Once the machine is level, tighten the locking nuts on each foot to prevent them from vibrating loose over time. If the feet are worn down or missing their rubber grip, replace them immediately.
A machine with metal feet directly on a hard floor will always be louder than one with rubber-tipped feet. Taking the time to perform this adjustment can often eliminate the need for additional physical spacing between the units.
Comparing Installation Gaps
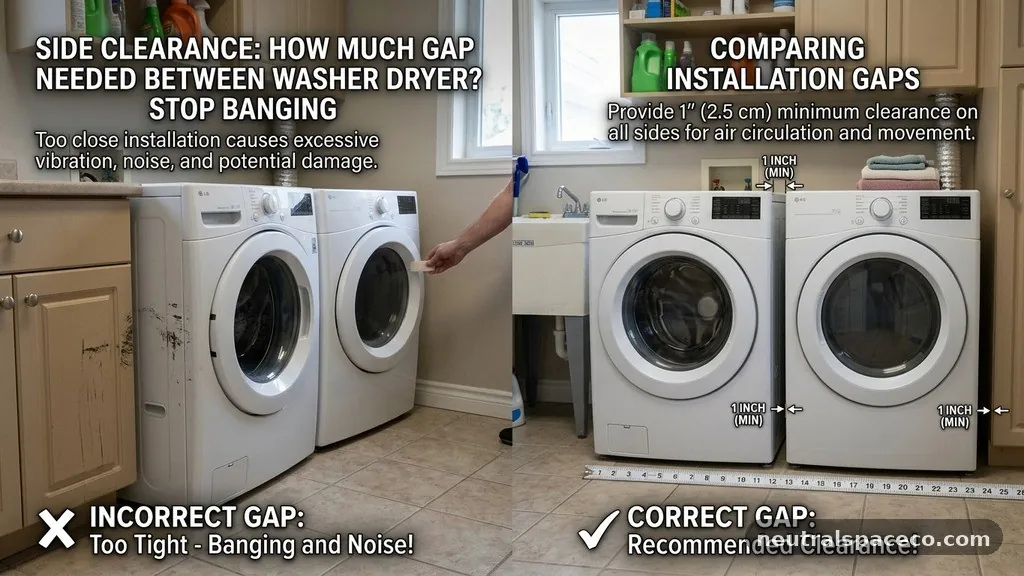
Different types of laundry setups require different approaches to clearance. The following table provides a quick reference for the recommended gaps in various installation scenarios to ensure quiet and safe operation.
| Installation Type | Recommended Side Gap | Recommended Rear Gap |
|---|---|---|
| Side-by-Side (Freestanding) | 1 inch | 4-6 inches |
| Closet/Alcove (Tight Fit) | 0.5 – 1 inch | 6 inches |
| Stackable Unit | 0.5 inch | 4 inches |
| Garage/Basement | 2 inches | 6 inches |
Common Mistakes During Setup
One frequent error is failing to remove the shipping bolts from a new washing machine. Manufacturers install these heavy-duty bolts to lock the drum in place during transport and prevent damage.
If you leave them in, the drum cannot move to absorb the impact of the spin cycle, causing the entire cabinet to shake violently. Always check the user manual to locate and remove these bolts before the very first load of laundry.
Another mistake is placing heavy items on top of the machines. While the top surface of a washer or dryer might look like a convenient shelf, the added weight can destabilize the unit.
This extra mass can change the center of gravity and cause the machine to vibrate more intensely during heavy loads. Keep the tops of your machines clear to allow for proper airflow and to prevent unnecessary noise during operation.
Selecting the Right Laundry Location
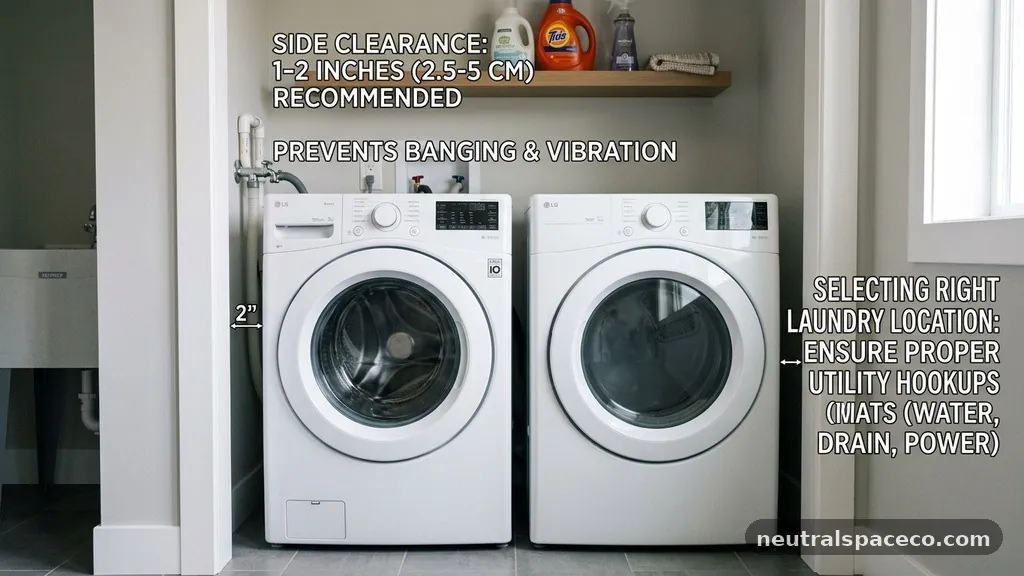
If you are renovating your home, think carefully about where you place your laundry area. Installing machines on a second floor or in a room with a crawlspace underneath often results in more vibration issues than a ground-floor slab.
If you must have your laundry on an upper floor, consider reinforcing the floor joists beneath the machines. A solid, non-flexing floor is the best defense against the banging sounds associated with high-speed spinning.
You should also verify that the room has adequate drainage and power access before finalizing your layout. If your plumbing or electrical outlets are positioned poorly, you may be forced to push the machines closer to the walls than is ideal. Planning your utility placement based on the specific dimensions of your appliances will save you from having to compromise on clearance.
Frequently Asked Questions
Does the type of floor affect how much clearance I need?
Yes, the floor material is a major factor in vibration. On a concrete slab, machines are generally more stable, allowing for the minimum 1-inch clearance. On wood floors, the structure may flex, meaning you might need extra space or heavy-duty anti-vibration mats to prevent the banging that occurs when the floor moves with the machine.
Can I use foam to fill the gap between the washer and dryer?
It is not recommended to fill the gap with rigid materials like wood or hard plastic. If you need to stop small items from falling between the machines, use a flexible, soft foam gap filler. However, ensure that the filler does not prevent the machines from moving independently, as they will still oscillate slightly during operation.
How do I know if my washer is unbalanced?
An unbalanced load typically manifests as a loud banging or thumping sound during the spin cycle. If the machine starts to move across the floor or vibrates excessively, the load is likely uneven. Stop the cycle, redistribute the clothes, and ensure that heavy items like towels are balanced by other heavy items to prevent the machine from shifting.
Why does my dryer make a banging sound even when empty?
If your dryer makes a banging sound while empty, there may be an issue with the internal rollers, the drum belt, or the blower wheel. These parts can become worn or obstructed over time. If the noise persists even after you have checked that the unit is level and has proper clearance, it is likely a mechanical issue requiring professional repair.
Is it safe to stack my washer and dryer?
Stacking is safe if you use the manufacturer-approved stacking kit designed for your specific models. These kits securely bolt the dryer on top of the washer, which often helps with stability because the two units become one connected piece. Ensure that the stack is level and that you have followed all manufacturer instructions regarding the weight limits of the lower unit.
Final Considerations for Laundry Stability
Achieving the right amount of side clearance is a balance between space efficiency and mechanical performance. By adhering to the 1-inch rule for side gaps and ensuring your machines are perfectly level, you can eliminate the frustrating banging that often plagues laundry rooms. Remember that every home is unique, and you should always prioritize the manufacturer’s specific installation requirements for your particular models.
If you find that your machines continue to produce excessive noise despite your best efforts, revisit the leveling and the condition of your floor. Sometimes, a simple adjustment of the feet or the addition of high-quality vibration pads is all it takes to restore quiet to your home. Take a moment to check your setup today, and you will likely find that a small amount of extra room is the key to a smoother, quieter laundry experience.